


Developing the website
Contents
You can contribute to the PostHog documentation, handbook, and blog in three ways:
- Quick edits via GitHub UI. For any page with an Edit this page link, you can use the GitHub web editor. This is best for text-only edits and basic file manipulation (renames, moving files).
- Local/Codespaces development. Run the website locally or in Codespaces, create a branch, commit changes, and open a PR. This is recommended for anything non-trivial. There are guidelines on how to get setup and do this below.
- Request changes via the Website team. This is the recommended approach for creating new landing pages or altering product pages, where there are some non-obvious design elements that require a lot of context to work with.
Details on how to get started with each of these options is below.
Method 1: Running with codespaces
Creating/running the codespace
Open the posthog.com repository in GitHub.
Click the Code button, then the Codespaces tab, then under the
...menu, choose New with options...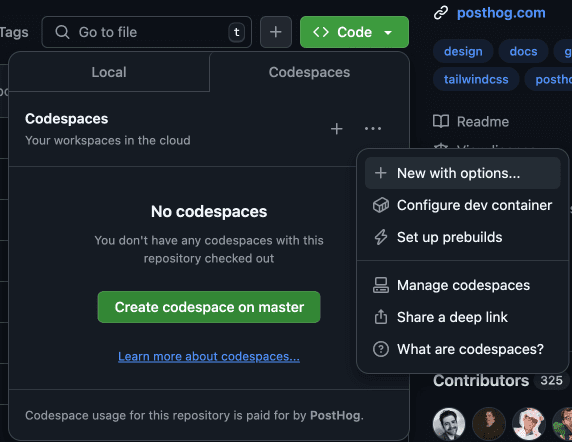
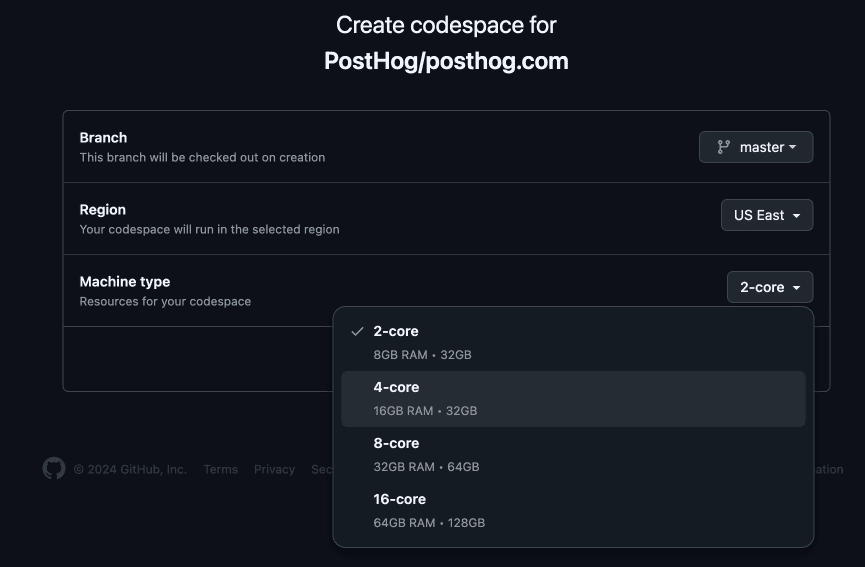
Under Machine type, choose 4-core.
When the repo opens in Codespaces, it will install some things automatically.

When completed, press any key.
In terminal, type
yarn && yarn startand hit [Enter].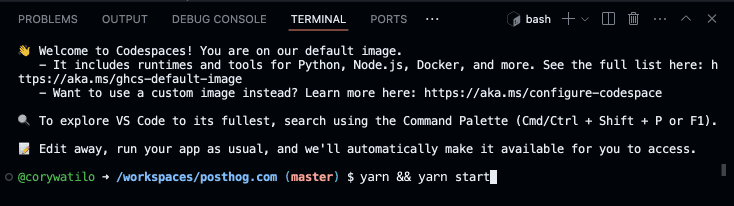
- This will take a while. The last step of the process is "Building development bundle" which will take a few minutes on its own.
- You may see a dialog that says, "Your application running on port 8001 is available." Don't be enticed by the big green button quite yet.
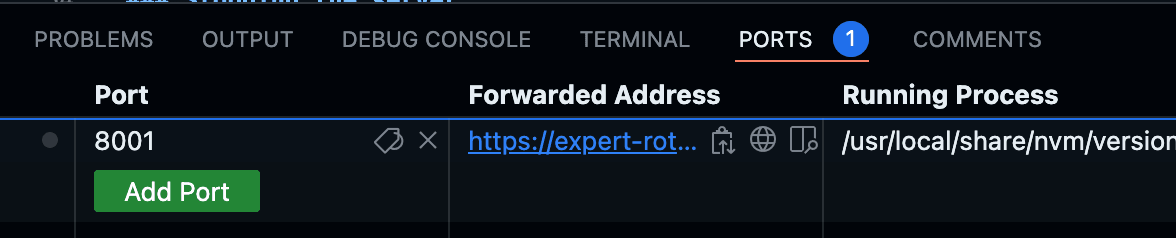
Once you see
success Writing page-data.json files..., you can click the green Open in browser button which will open the site at http://localhost:8001.You can also click the Ports tab to access the URL where you can preview the site. Cmd + click the URL seen here.
Committing and pushing changes
Use the built-in Git tab in VS Code to commit and push your changes.
- From the Git source control
...menu, choose Checkout to... to create a new branch.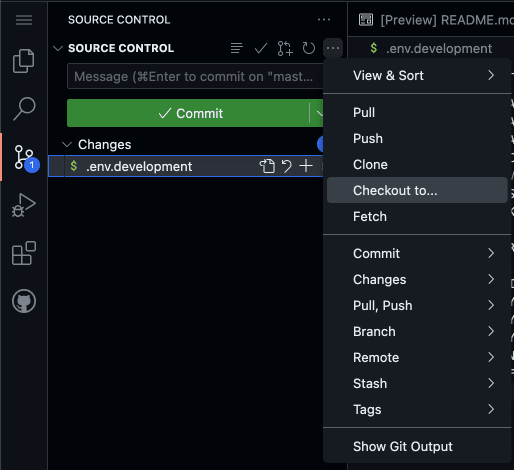
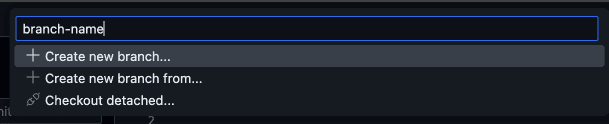
- Type a new branch name and press enter.
- Now you can commit changes to your new branch. Type a commit message and use
Cmd+Enter(or push the big green button).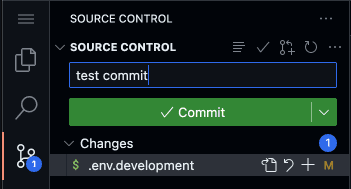
- If you see the dialog below, choose Always to always stage all files you've changed. (Otherwise, you'll need to hit the
+button next to each file you want to commit.)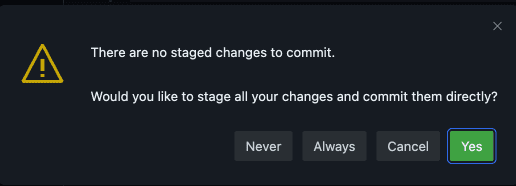
- Now that your changes are committed, it's time to publish them to GitHub.

Note: After finishing changes on your branch, be sure to switch back to
masterso you don't inadvertently make future changes to your current branch.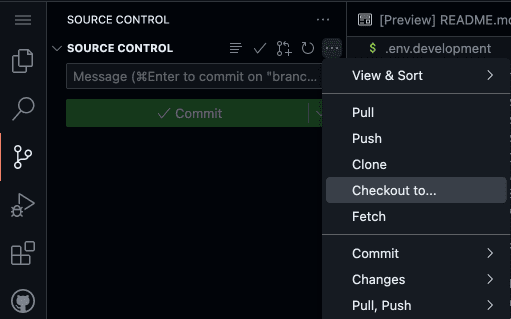

Stopping the server
- Place your cursor into Terminal and type
Cmd+Cto stop the server. - In the bottom left corner of the window, click Codespaces: [your codespace name], then Stop current codespace.
Notes
If you plan on using this codespace frequently, disable Auto-delete codespace in the ... menu under the Code > Codespaces dropdown in the repo.
Once you have Codespaces setup, you can easily start making edits.
Method 2: Edit posthog.com locally
Prerequisites
Install:
- Git
- Node.js 18.x
- Yarn 1.x
- (Apple silicon) Rosetta 2
Optional helpers:
- GitHub Desktop (recommended)
- VS Code
Cloning the repo
From the command line:
From GitHub Desktop:
- Go to the repo
- Click Code → Open with GitHub Desktop → Clone
- Once cloned, click Open in VS Code
Running locally
Apple silicon only:
Install dependencies and start the site:
Once built, open http://localhost:8001 to start previewing your local environment. You can then start modifying the code and previewing how changes appear. When your changes are ready, you can commit them.
Committing changes
It's best to create commits that are focused on one specific area. For example, create one commit for textual changes and another for functional ones. Another example is creating a commit for changes to a section of the handbook and a different commit for updates to the documentation. This helps the pull request review process and also means specific commits can be cherry picked.
Committing via the command line
First, stage your changes:
For example:
Once all the files that have been changed are staged, you can perform the commit:
For example:
Committing via GitHub Desktop**
Files that have been changed can be viewed within GitHub Desktop along with a diff of the specific change.
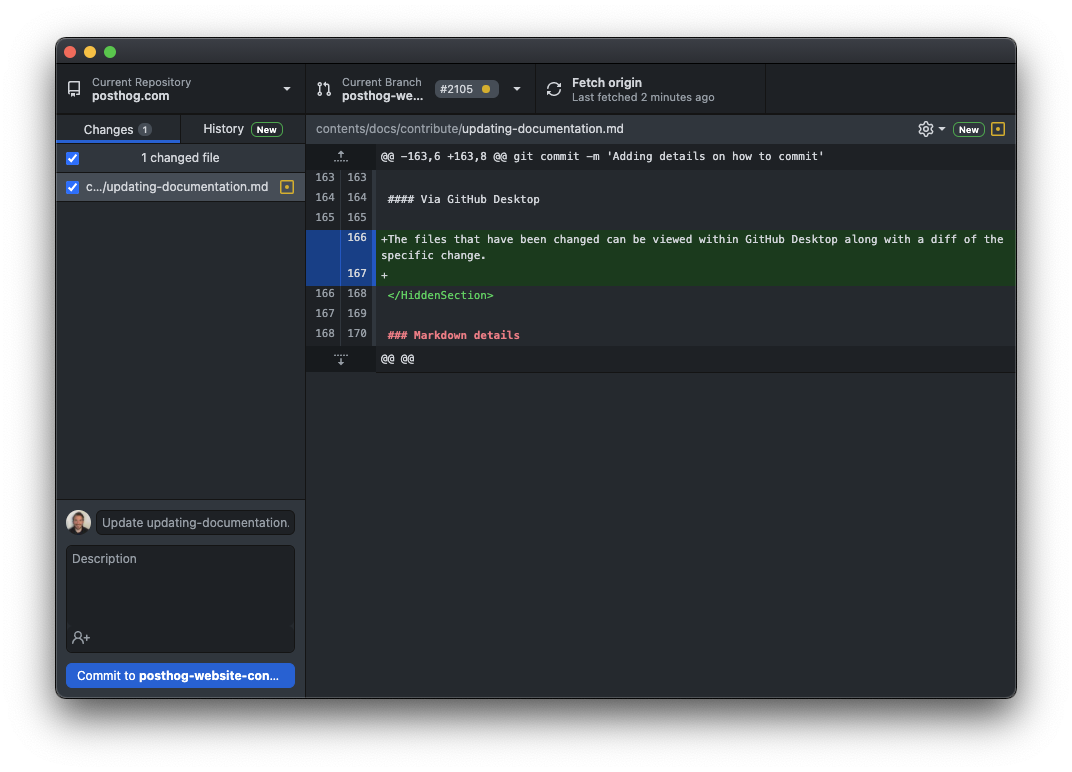
Select the files that you want to be part of the commit by ensuring the checkbox to the left of the file is checked within GitHub Desktop. Then, write a short descriptive commit message and click the Commit to... button.
Pushing changes to GitHub
In order to request that the changes you have made are merged into the main website branch you must first push them to GitHub.
Pushing via the command line
For example:
When this is done, the command line will show output similar to the following:
This output tells you that you can create a pull request by visiting a link. In the case above, the link is https://github.com/PostHog/posthog.com/pull/new/posthog-website-contribution. Follow the link to complete your pull request.
Pushing via GitHub Desktop
Once you have committed the changes you want to push to GitHub, click the Push origin button.

Creating a pull request (PR)
Create a PR to request that your changes be merged into the main branch of the repository.
Creating PRs from the command line
Navigate to the link shown when you push your branch to GitHub. For example, https://github.com/PostHog/posthog.com/pull/new/posthog-website-contribution shown below:
Creating PRs via GitHub Desktop
With the branch published, click the Create pull request button.
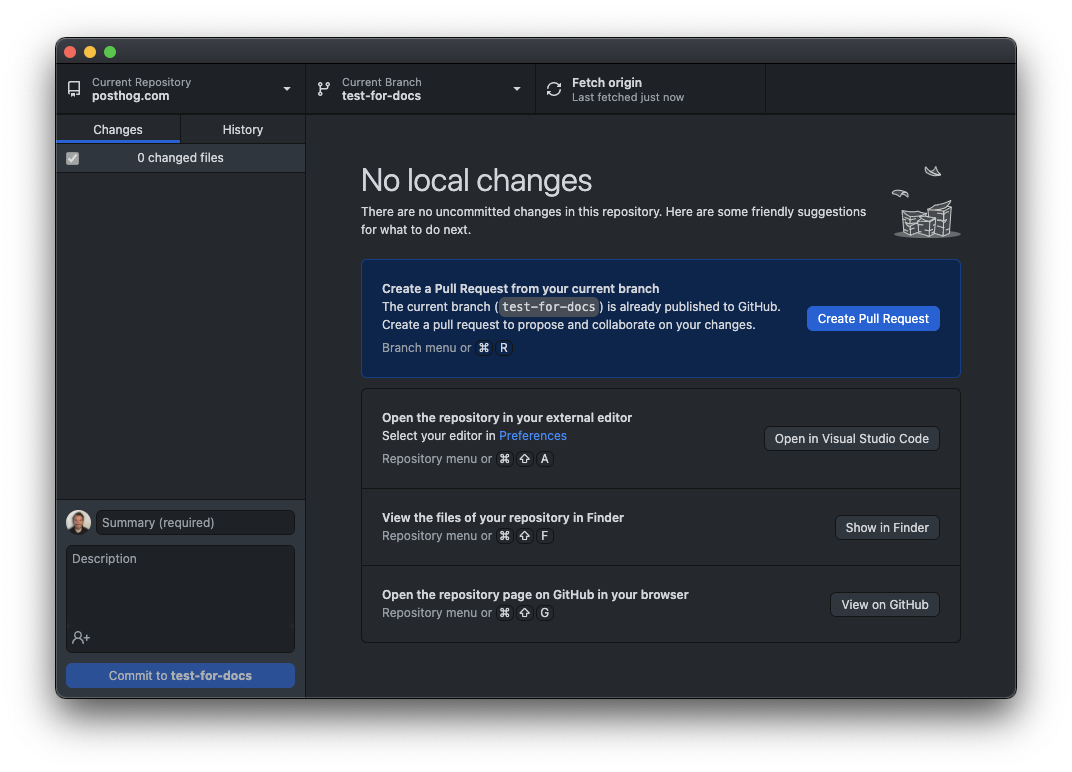
This will open up a page on github.com in your default web browser.
If you are pushing to an existing branch, navigate to the posthog.com repo and switch to the new branch using the dropdown:

Then, open the Contribute dropdown and click the Open pull request button.
Make the pull request title descriptive name and complete the detail requested in the body.
If you know who you would like to review the pull request, select them in the Reviewers dropdown.
Method 3: Briefing the website team
Some parts of the site have non-obvious design elements, such as responsive layouts, which are currently best handled by the Website team. If you want to make changes to these sections, or create wholly new pages with unique layouts, you should request them from the Website team.
We have a template setup to help you brief the team directly. You should aim to give the Website team at least two weeks notice of your request if possible and should provide a full draft of the content you want on the new page. All new web requests are tagged with the new landing page tag so you can filter them easily.
If you have questions about a brief, please ask in the #posthogdotcom Slack channel.
Can't I just vibecode it?
Vibecoding is good for quick prototypes, but generally doesn't produce better results than the methods above. This is especially true when creating new landing pages, as these pages have complex requirements. You usually can get a vibecoded version to a reasonable state in a local preview, but it tends to then be harder for others to approve and fix as they have to untangle your machine-made code.
If you're committed to vibecoding we strongly recommend giving your AI tool of choice some appropriate context first by pointing it at the following files:
posthog.com/contents/handbook/engineering/posthog-com/developing-the-website.mdxposthog.com/contents/handbook/engineering/posthog-com/how-posthog-website-works.mdxposthog.com/README.mdposthog.com/src/components/Products/Slides/examples.mdposthog.com/contents/example-components.mdx
We plan to regularly revisit this guidance as AI coding tools improve.
Making changes to posthog.com
Below we've collected some guidance on how different parts of the site function and some broad advice for editing them. For more information on the site architecture, check out how the PostHog website works
Markdown details
Most parts of the website, including the docs, handbook, and blog, are built from Markdown files with a simple structure.
Frontmatter
Most PostHog pages utilize frontmatter as a way of providing additional data to the page. Available frontmatter varies based on the template the page uses. Templates are determined based on the folder the file resides in:
Blog
Markdown files located in /contents/blog
date: the date the blog was postedtitle: the title that appears at the top of the blog post and on the blog listing pagerootPage: necessary for listing all blog posts on /blog. should always be set to/blogauthor: the author(s) of the post. correlates to your handle located in /src/data/authors.jsonfeaturedVideo: the iframe src of the video that appears at the top of the post. replaces the featured image on post pages.featuredImage: the Cloudinary URL of the image that appears at the top of the post and on the blog listing pagefeaturedImageType:standard|full- determines the width of the featured image on the blog postcategory: the broader category the post belongs to. one of the following:CEO diariesEngineeringGeneralInside PostHogPostHog newsProduct growthStartupsUsing PostHog
tags: the more specific tag(s) the post belongs to. an array containing any number of the following:AlertsCEO diariesClickHouseComparisonsCultureEngineeringExplainersFeature flagsGeneralGrowthGuidesHardwareInside PostHogLLMLaunch weekMarketingOffsitesOpen sourcePeoplePostHog newsPrivacyProduct analyticsProduct engineersProduct metricsProduct updatesRelease notesStartupsY Combinatordata pipelinesdata warehouse
seo: object containing SEO metadata:metaTitle: StringmetaDescription: String
Tutorials
Markdown files located in /contents/tutorials
date: the date the tutorial was postedtitle: the title that appears at the top of the tutorial and on the tutorial listing pageauthor: the author(s) of the tutorial. Correlates to your handle located in /src/data/authors.jsonfeaturedTutorial: determines if tutorial should be featured on the homepagefeaturedVideo: the iframe src of the video that appears at the top of the tutorialfeaturedImage: the Cloudinary URL of the image that appears at the top of the tutorial and on the tutorial listing pagetags: the tag(s) the tutorial belongs to. an array containing any number of the following:AIDeskHogLLM analyticsactionsappscdpcohortsconfigurationdashboardsdata managementdata warehouseerror trackingeventsexperimentationexperimentsfeature flagsfiltersfunnelsgroup analyticsheatmapsinsightslifecyclepersonsproduct analyticsproduct osproduct-osretentionsession replaysession replayssessionssettingssite-appssqlstickinesssubscriptionssurveystoolbartrendsuser pathsweb analyticszapier
seo: object containing SEO metadata:metaTitle: StringmetaDescription: String
Docs & Handbook
Markdown files located in /contents/docs and /contents/handbook
title: the title that appears at the top of the handbook / doc pageseo: object containing SEO metadata:metaTitle: StringmetaDescription: String
Comparison pages
Create a table on a "PostHog vs..." page with the following components. (You can see examples of how this is used in this pull request.)
Import the components at the top of the post content (after frontmatter):
Create a table like:
In ComparisonRow:
- Values for
column1andcolumn2can be:{true}|{false}|"Text string" featureis required butdescriptioncan be omitted (only if not using that column for the entire table)
Customers
Markdown files located in /contents/customers
title: the title of the case studycustomer: the name of the customerlogo: the customer logofeaturedImage: the Cloudinary URL of the image that appears in the card on the customers listing pageindustries: a list of industries that apply to the companyusers: a list of user types that use the company's producttoolsUsed: a list of highlighted PostHog tools used by the companyseo: object containing SEO metadata:metaTitle: StringmetaDescription: String
Plain
If the file doesn't reside in one of the above folders, it uses the plain template.
title: the title that appears at the top of the pageshowTitle:false- if omitted, the title will appear at the top of the pagewidth:sm|md|lg|full- determines the width of the pagenoindex:true|false- determines whether to index the page or notseo: object containing SEO metadata:metaTitle: StringmetaDescription: String
You can often refer to the source of existing pages for more examples, but if in doubt, you can always ask for help.
Images/GIFs
If you need to upload images, you can upload them to Cloudinary
To include an image in a markdown file, you can use Cloudinary URLs, like so:
In this case, Twin Peaks is the alt-text applied to the image.
Links to/from the navigation
Once you've made a new markdown file, you should link to it from the sidebar where appropriate.
The sidebar is generated from src/navs/index.js.
Redirects
Redirects are managed in vercel.json which is located in the root folder.
To declare a new redirect, open vercel.json and add an entry to the redirects list:
The default HTTP status code is 308 (permanent), but if the redirect should be temporary (307), it can be updated like this:
Preview branch
When a PR is created a series of checks are run (to ensure nothing in your breaks the website) and Vercel will generate a preview link available in the Vercel bot comment. This includes all of your changes, so you can preview before your pull request is merged. This is also helpful for reviewers.
An initial build can take up to 50 minutes to run. After the initial build, subsequent builds should complete in under ~15 minutes. We're limited to two concurrent builds, so if there's a backlog, this process can take longer.
Because Vercel charges per seat, we don't automatically invite all team members to our Vercel account. If your build fails, you can run yarn build locally to see what's erroring out. If nothing is erroring locally, it's likely the build timed out in Vercel. The Website & Docs team monitors for failed builds, so they'll re-run it for you. If the build is urgent, give a shout in #team-website-and-docs and someone with Vercel access can trigger a rebuild for you.

Note: Checks are run automatically for PostHog org members and previous contributors. First time contributors will require authorization for checks to be run by a PostHog org member.
Deployment
To get changes into production, the website deploys automatically from master. The build takes up to an hour, but can be delayed if other preview builds are in the queue.